

Create and configure a hypertable
Create a hypertable, set chunk intervals, control default indexes, and migrate existing data
Hypertables turn ordinary PostgreSQL tables into time-partitioned tables made of
chunks, so you can scale to very large datasets. Add
WITH (timescaledb.hypertable) to a standard CREATE TABLE statement to create one.
Create a hypertable
Section titled “Create a hypertable”Create a hypertable from scratch in Tiger Console or with SQL.
To create a hypertable in Tiger Console:
- Select your service, then click
Actions - Under
Goals, findCreate a hypertableand clickGet startedIn the wizard, select the
Create new tabletab.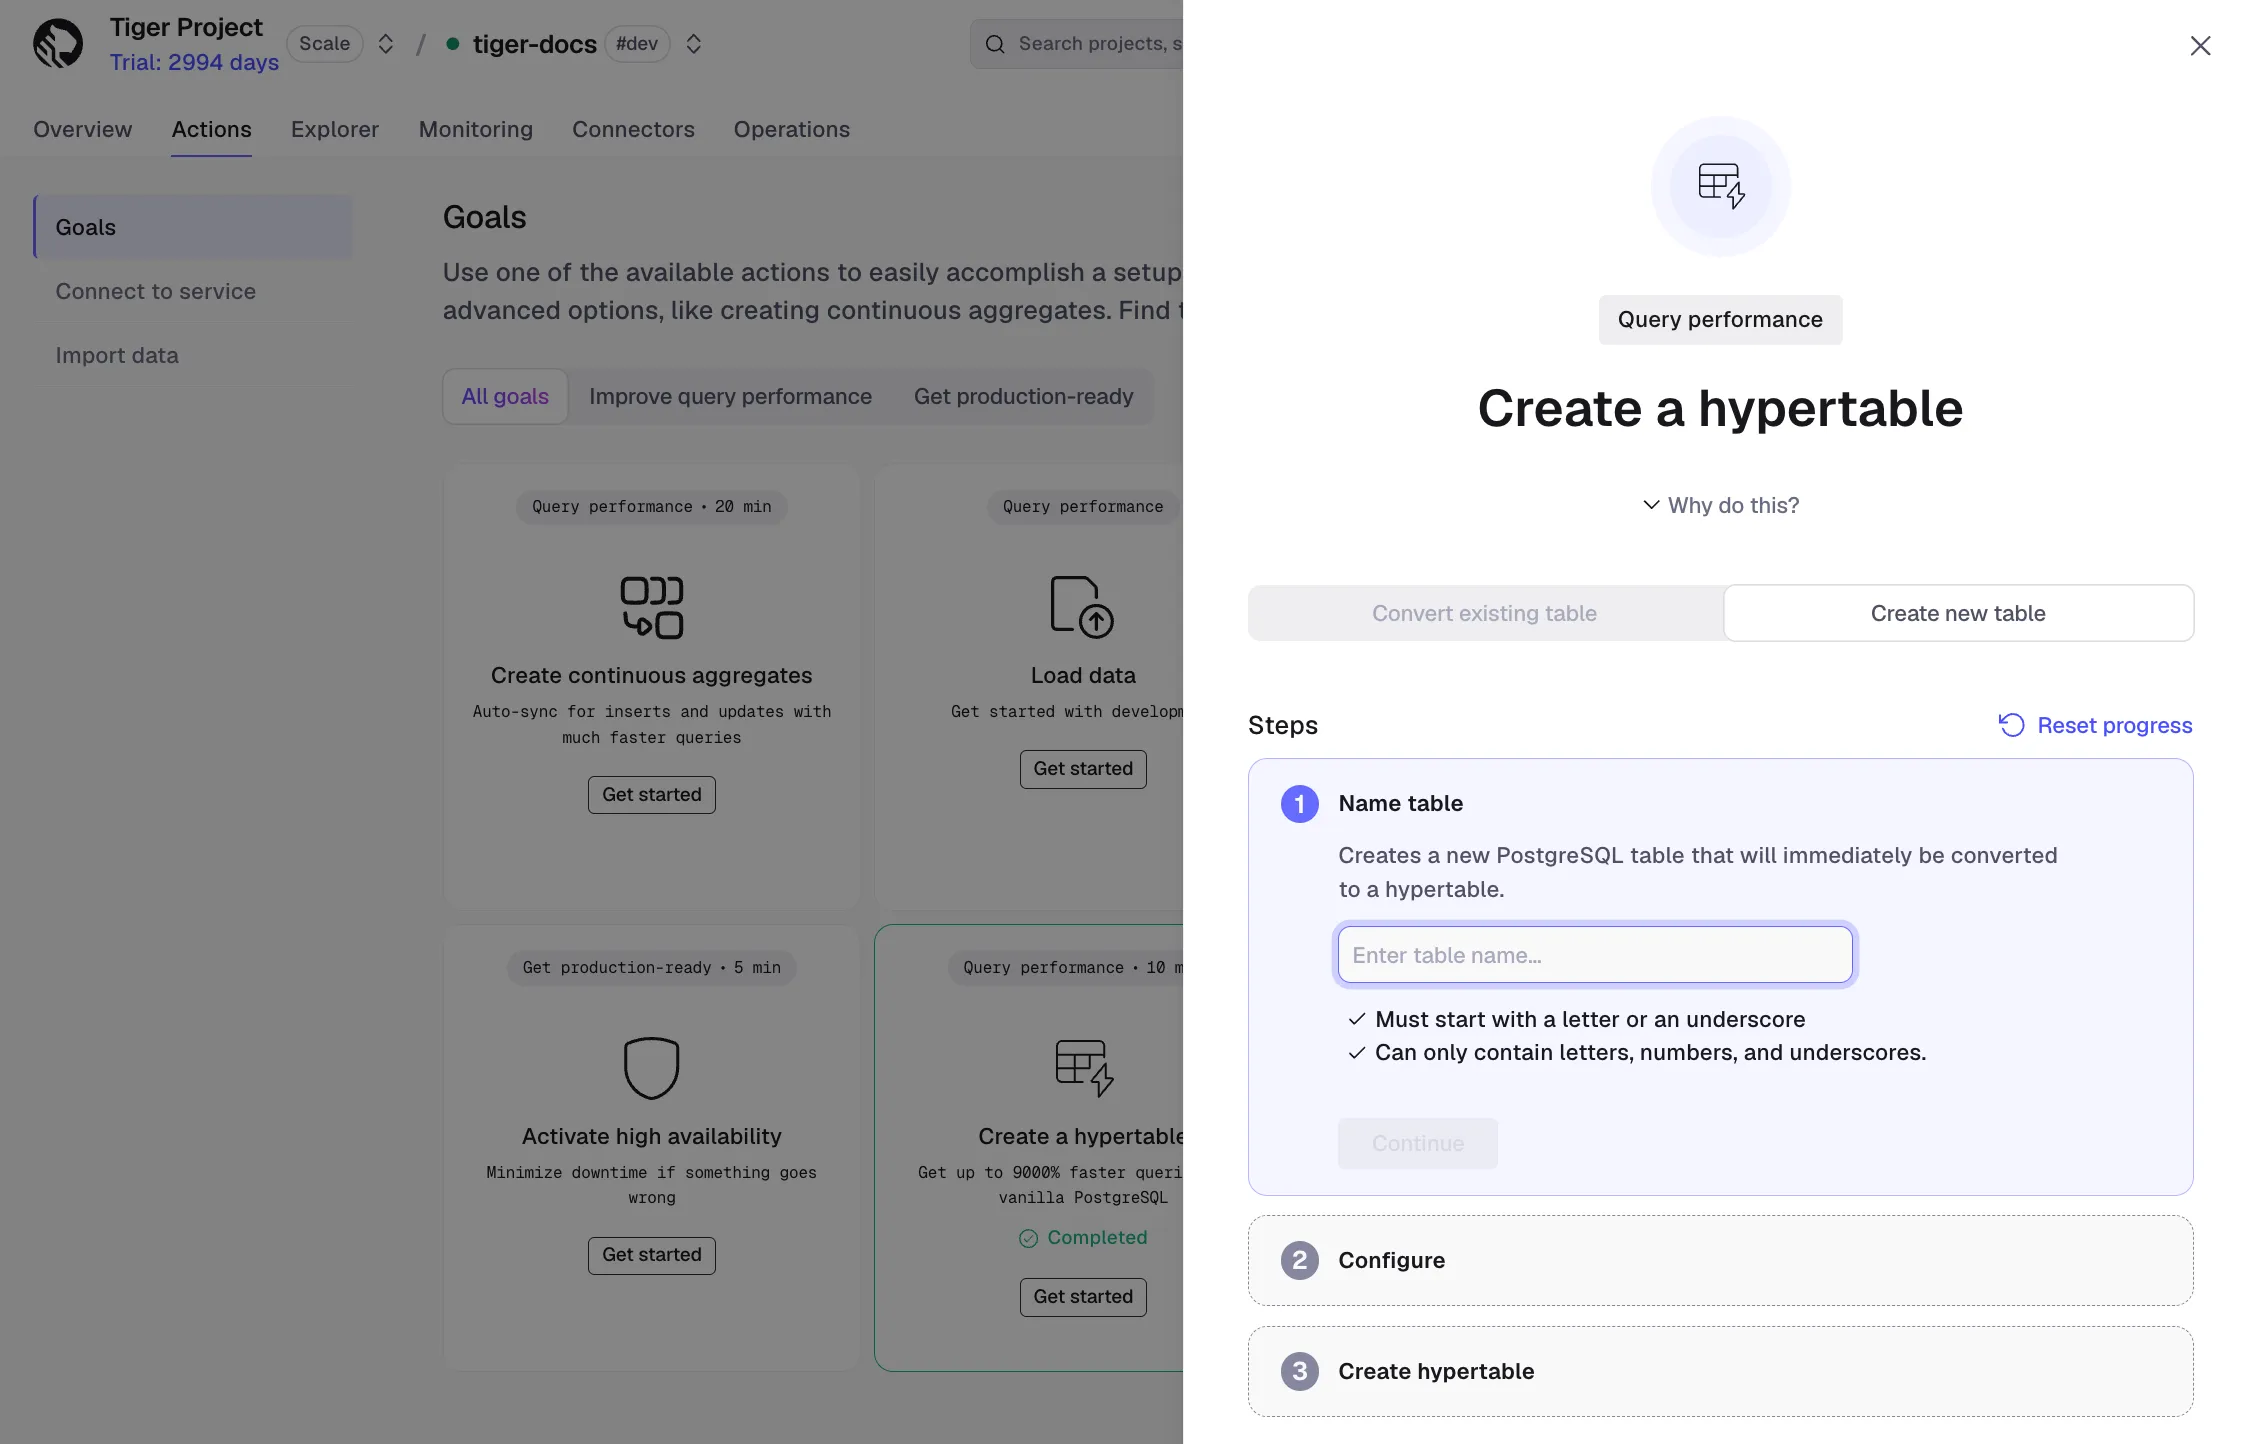
- Name the table
Under
Name table, enter a name, then clickContinue. The name must start with a letter or an underscore, and can contain only letters, numbers, and underscores. - Configure the partition column
Under
Configure, set theNameandTypeof the column used to partition data into chunks, for examplecreated_atwith typeTIMESTAMP WITH TIME ZONE. Optionally, select anAdditional dimensionto partition on a secondary column. ClickContinue. - Create the hypertable
Under
Create hypertable, review the generated SQL, then clickRun and proceed. Your new table is created as a hypertable.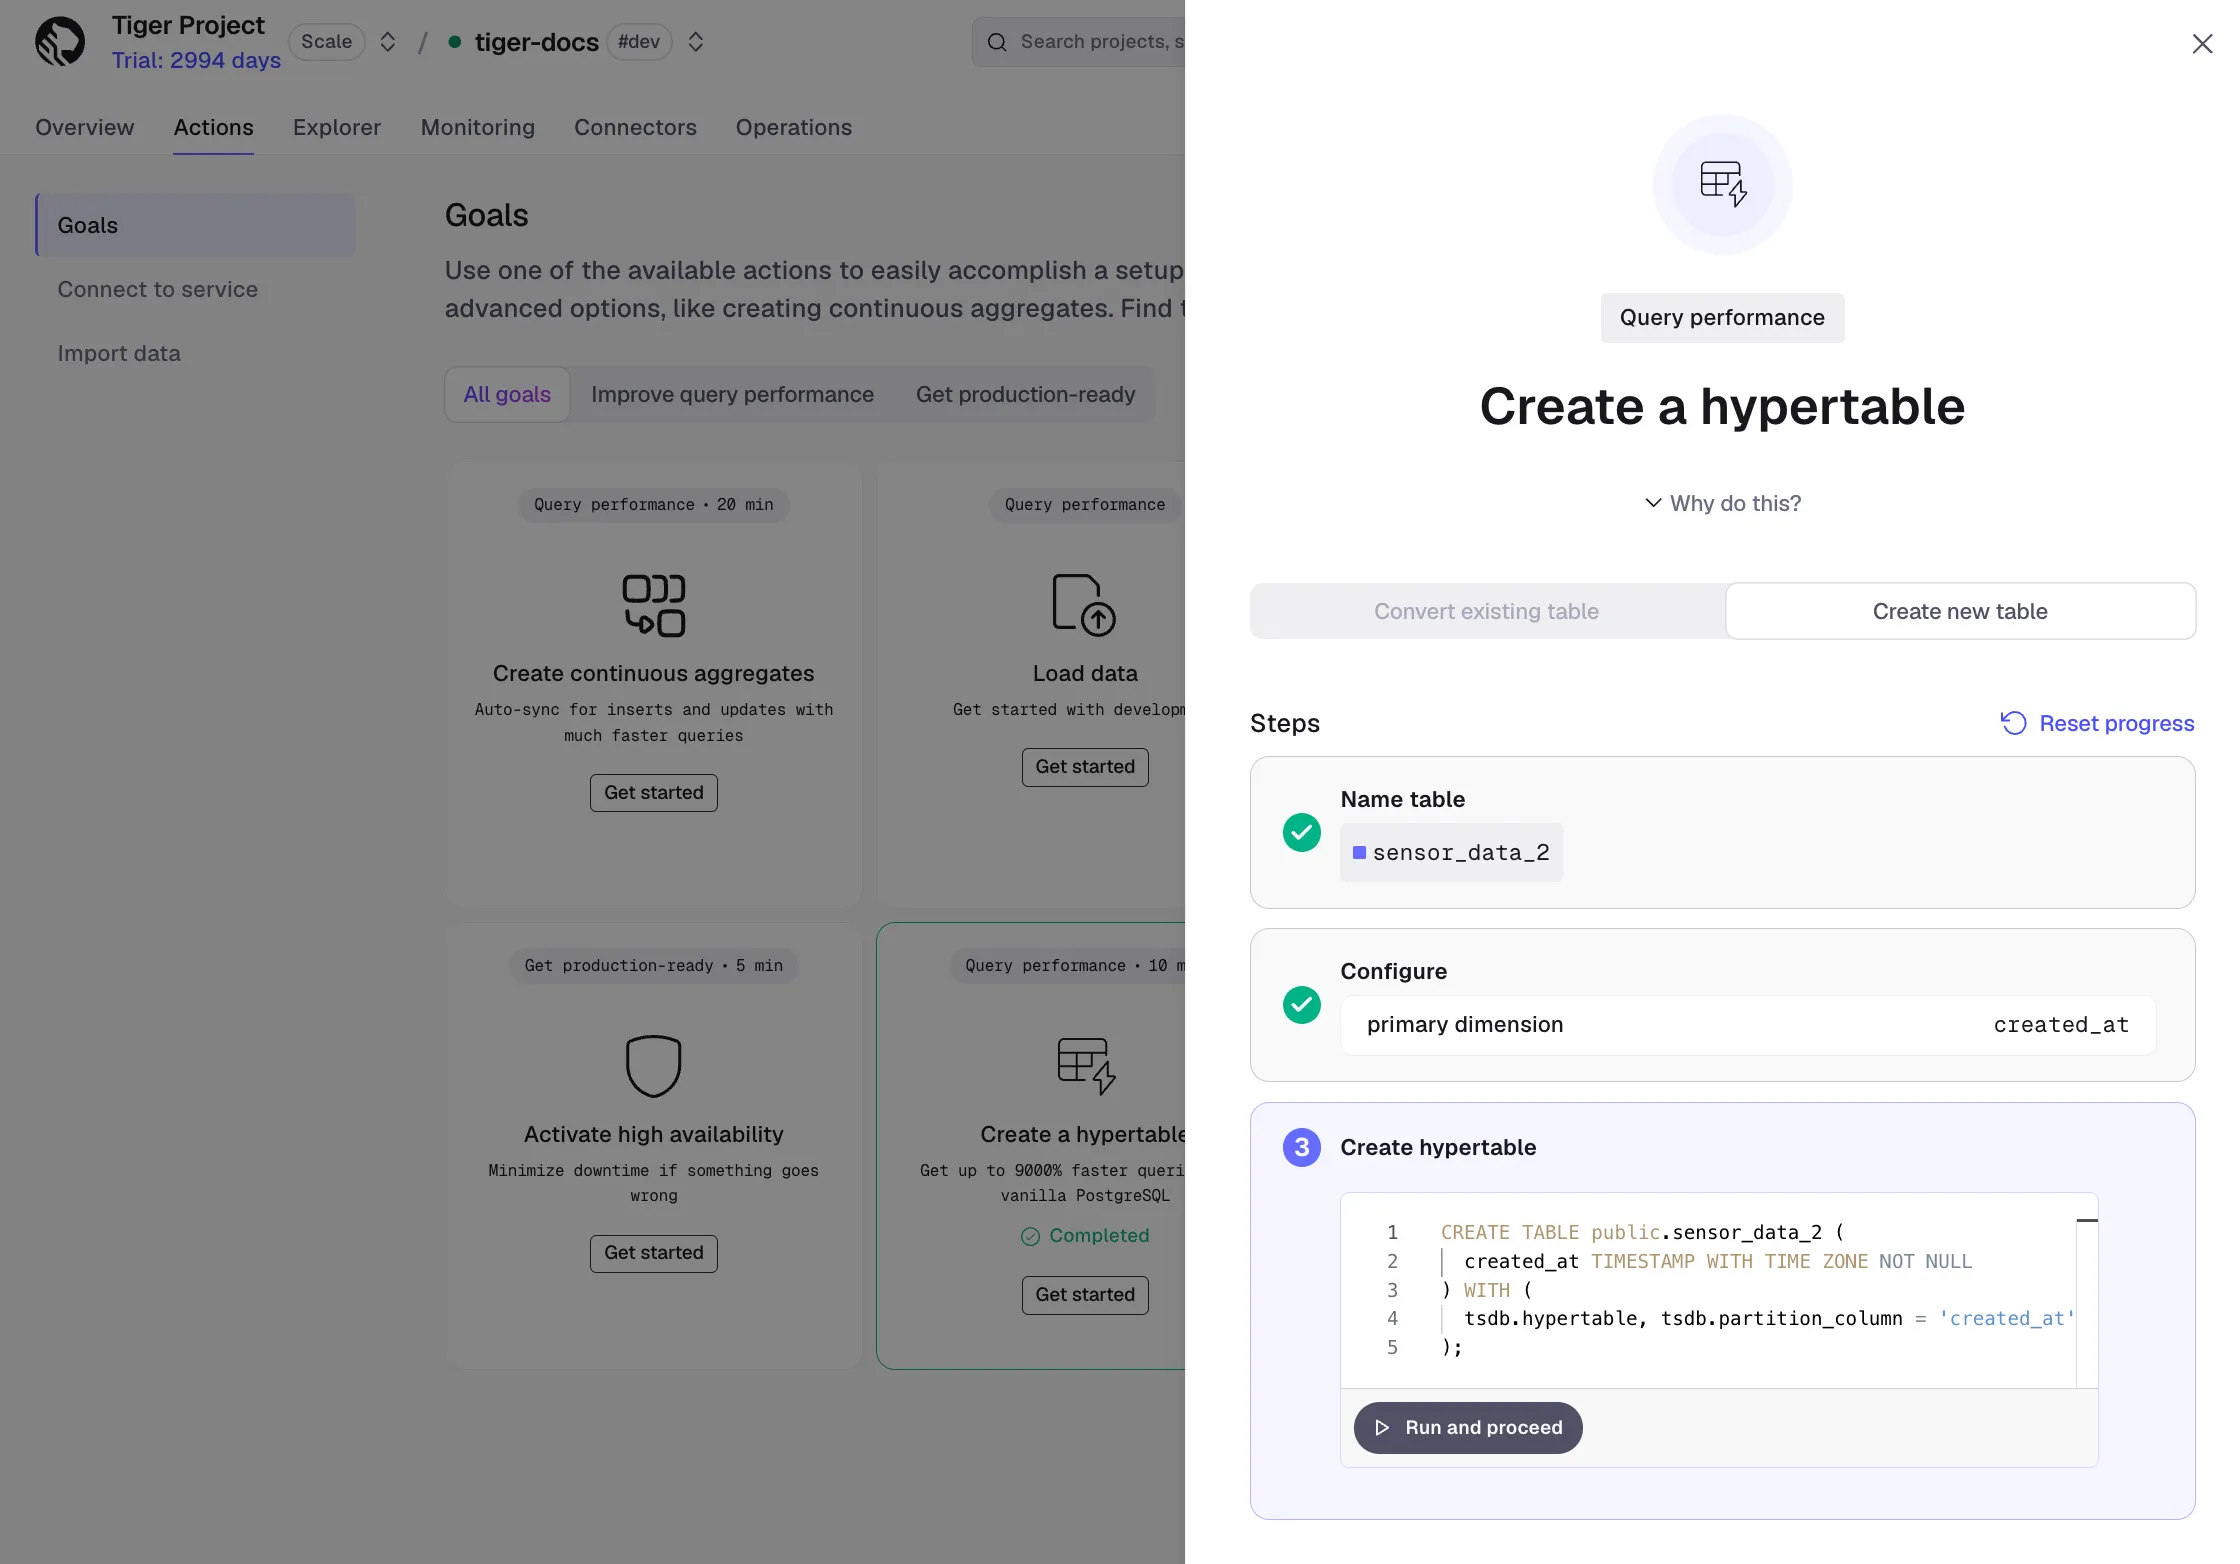
The simplest form auto-detects the partition column from the first timestamptz column
and adds NOT NULL automatically if needed:
CREATE TABLE sensor_data ( time TIMESTAMPTZ NOT NULL, device_id INT, temperature DOUBLE PRECISION) WITH (timescaledb.hypertable);If your table has multiple timestamp columns or uses a non-standard name, specify the partition column explicitly:
CREATE TABLE order_events ( created_at TIMESTAMPTZ NOT NULL, order_id BIGINT, status TEXT) WITH ( timescaledb.hypertable, timescaledb.partition_column = 'created_at');Configuration options
Section titled “Configuration options”Set these options in the WITH clause to control how the hypertable is created:
| Option | Default | Description |
|---|---|---|
timescaledb.hypertable | — | Required. Marks the table as a hypertable. |
timescaledb.partition_column | Auto-detected | The column used to partition data into chunks. Auto-detected from the first timestamptz column. Required if the table has no timestamptz column or has more than one. |
timescaledb.chunk_interval | 7 days | The time range each chunk covers. Tune this for your ingest rate and memory. See Sizing hypertable chunks. |
timescaledb.create_default_indexes | true | Creates an index on the partition column automatically. Set to false for large bulk loads where you want to add indexes after loading. |
Set chunk interval
Section titled “Set chunk interval”Choose a chunk interval so that all active chunks fit in memory. The default is 7 days, which works well for many workloads. For high-throughput ingestion, a shorter interval like 1 day may be better:
CREATE TABLE high_throughput_metrics ( time TIMESTAMPTZ NOT NULL, device_id INT, value DOUBLE PRECISION) WITH ( timescaledb.hypertable, timescaledb.chunk_interval = '1 day');Disable default indexes
Section titled “Disable default indexes”For large bulk loads into a new hypertable, skip automatic index creation and add indexes after the data is loaded:
CREATE TABLE bulk_load_target (  time        TIMESTAMPTZ NOT NULL,  device_id   INT,  value       DOUBLE PRECISION) WITH (  timescaledb.hypertable,  timescaledb.create_default_indexes = false);
-- Load data first, then create indexesCREATE INDEX ON bulk_load_target (time DESC);CREATE INDEX ON bulk_load_target (device_id, time DESC);
Convert an existing table
Section titled “Convert an existing table”Convert an existing PostgreSQL table that already has data to a hypertable in Tiger Console or with SQL.
To convert an existing table in Tiger Console:
- Select your service, then click
Actions - Under
Goals, findCreate a hypertableand clickGet startedIn the wizard, select the
Convert existing tabletab.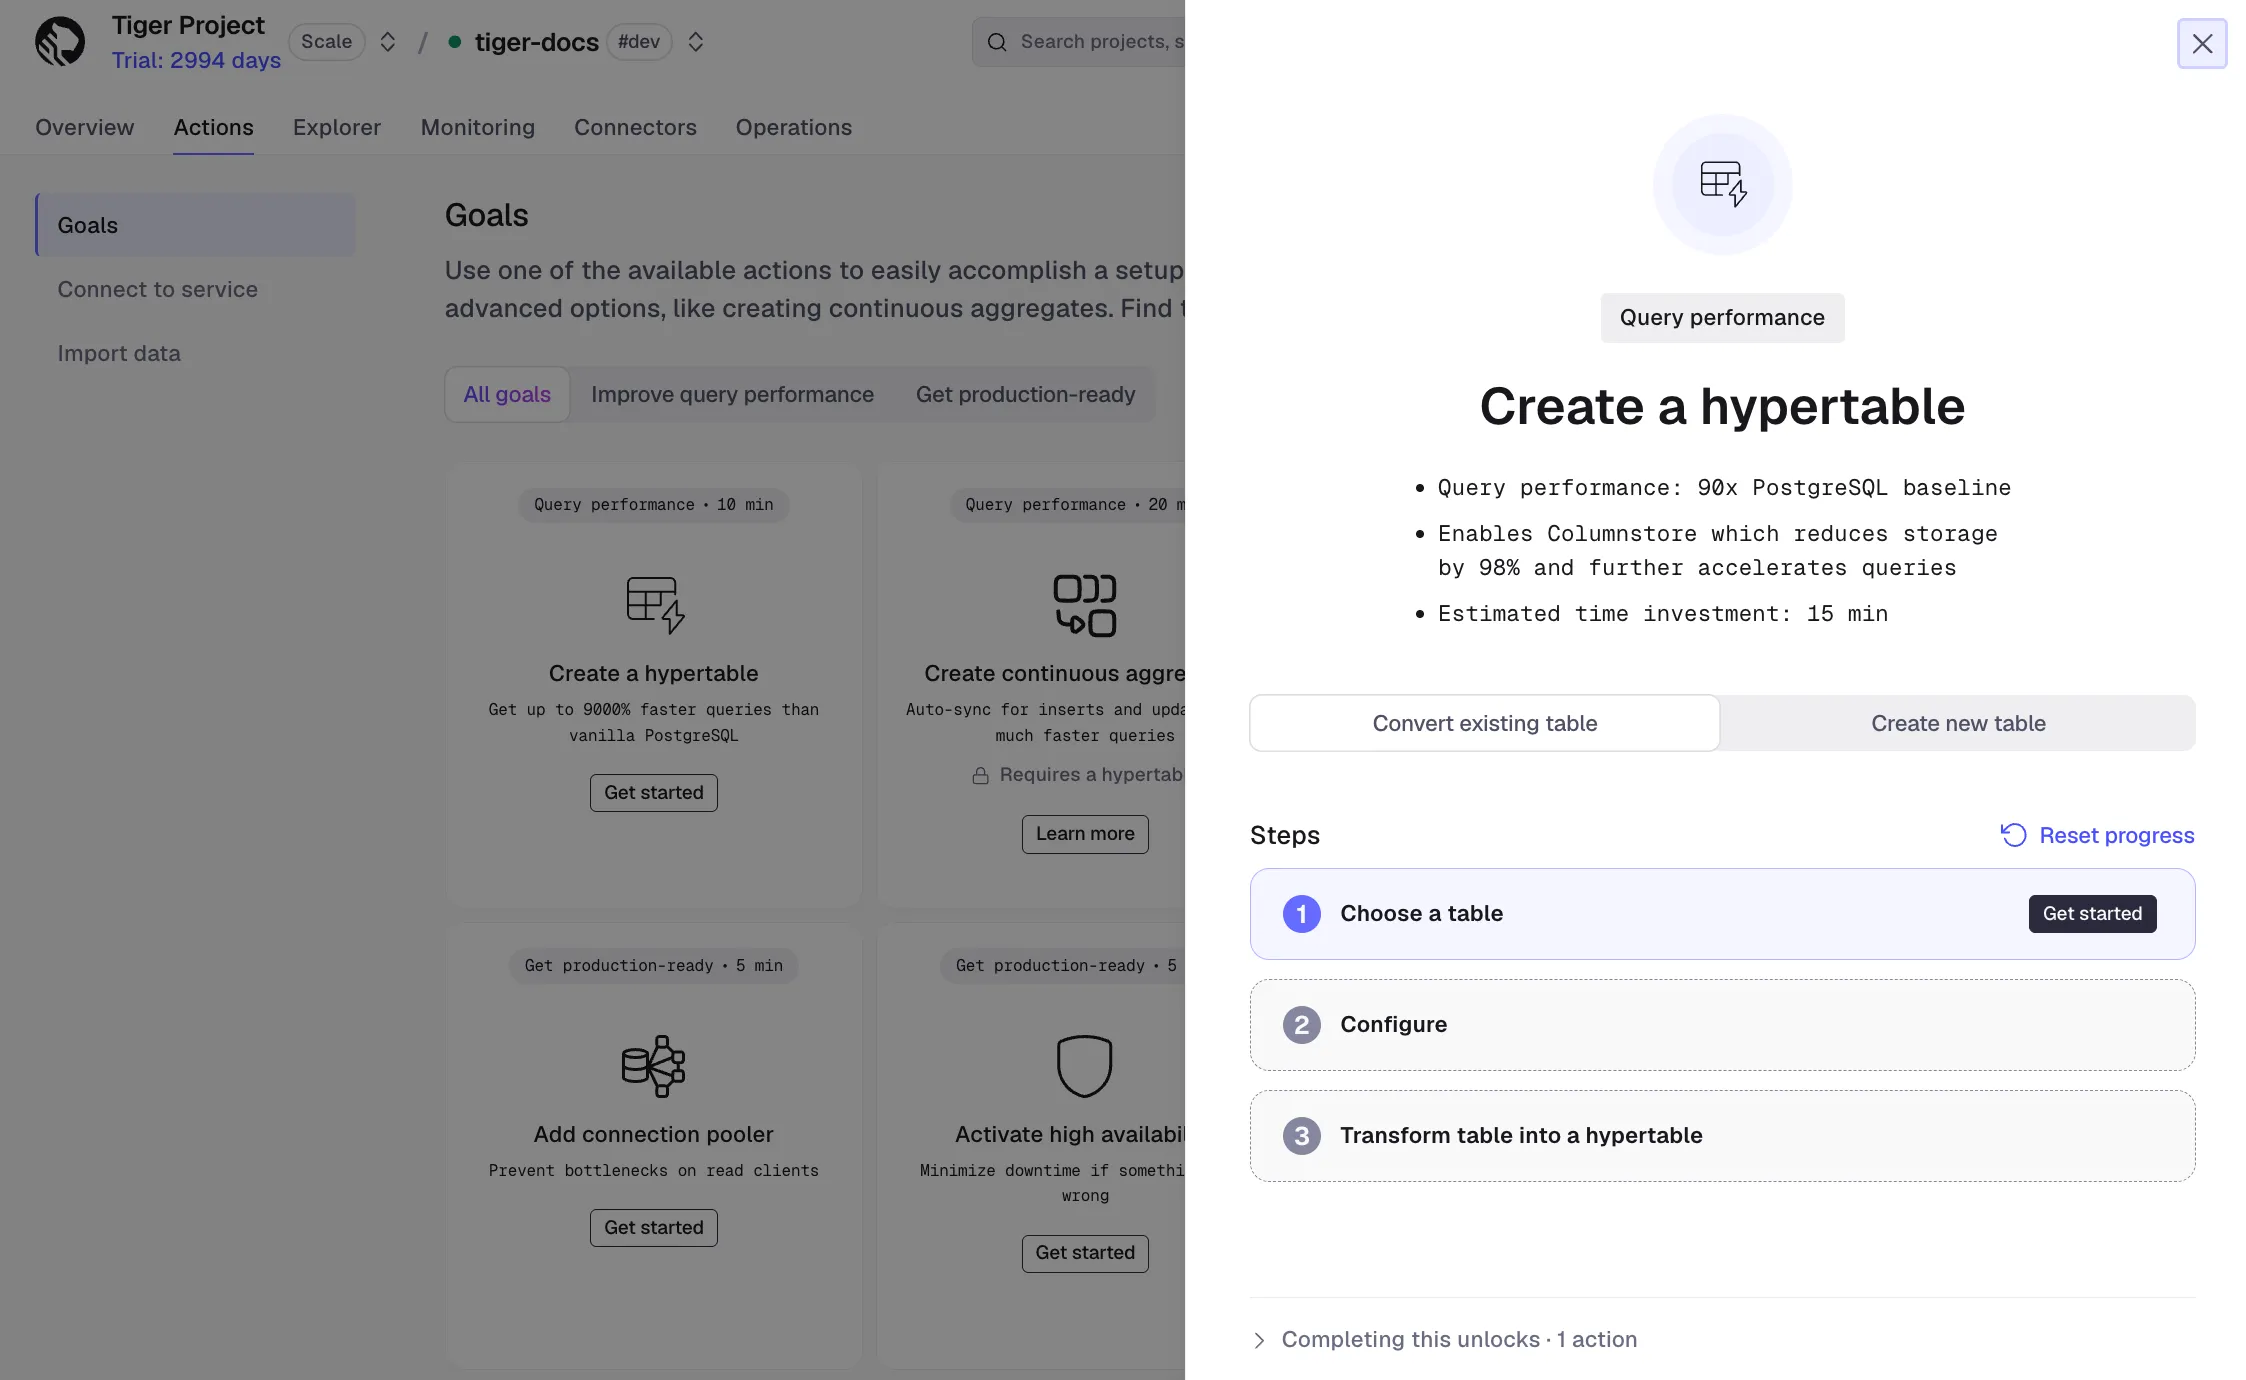
- Choose the table to convert
Under
Choose a table, select the PostgreSQL table you want to convert. - Configure the partition column
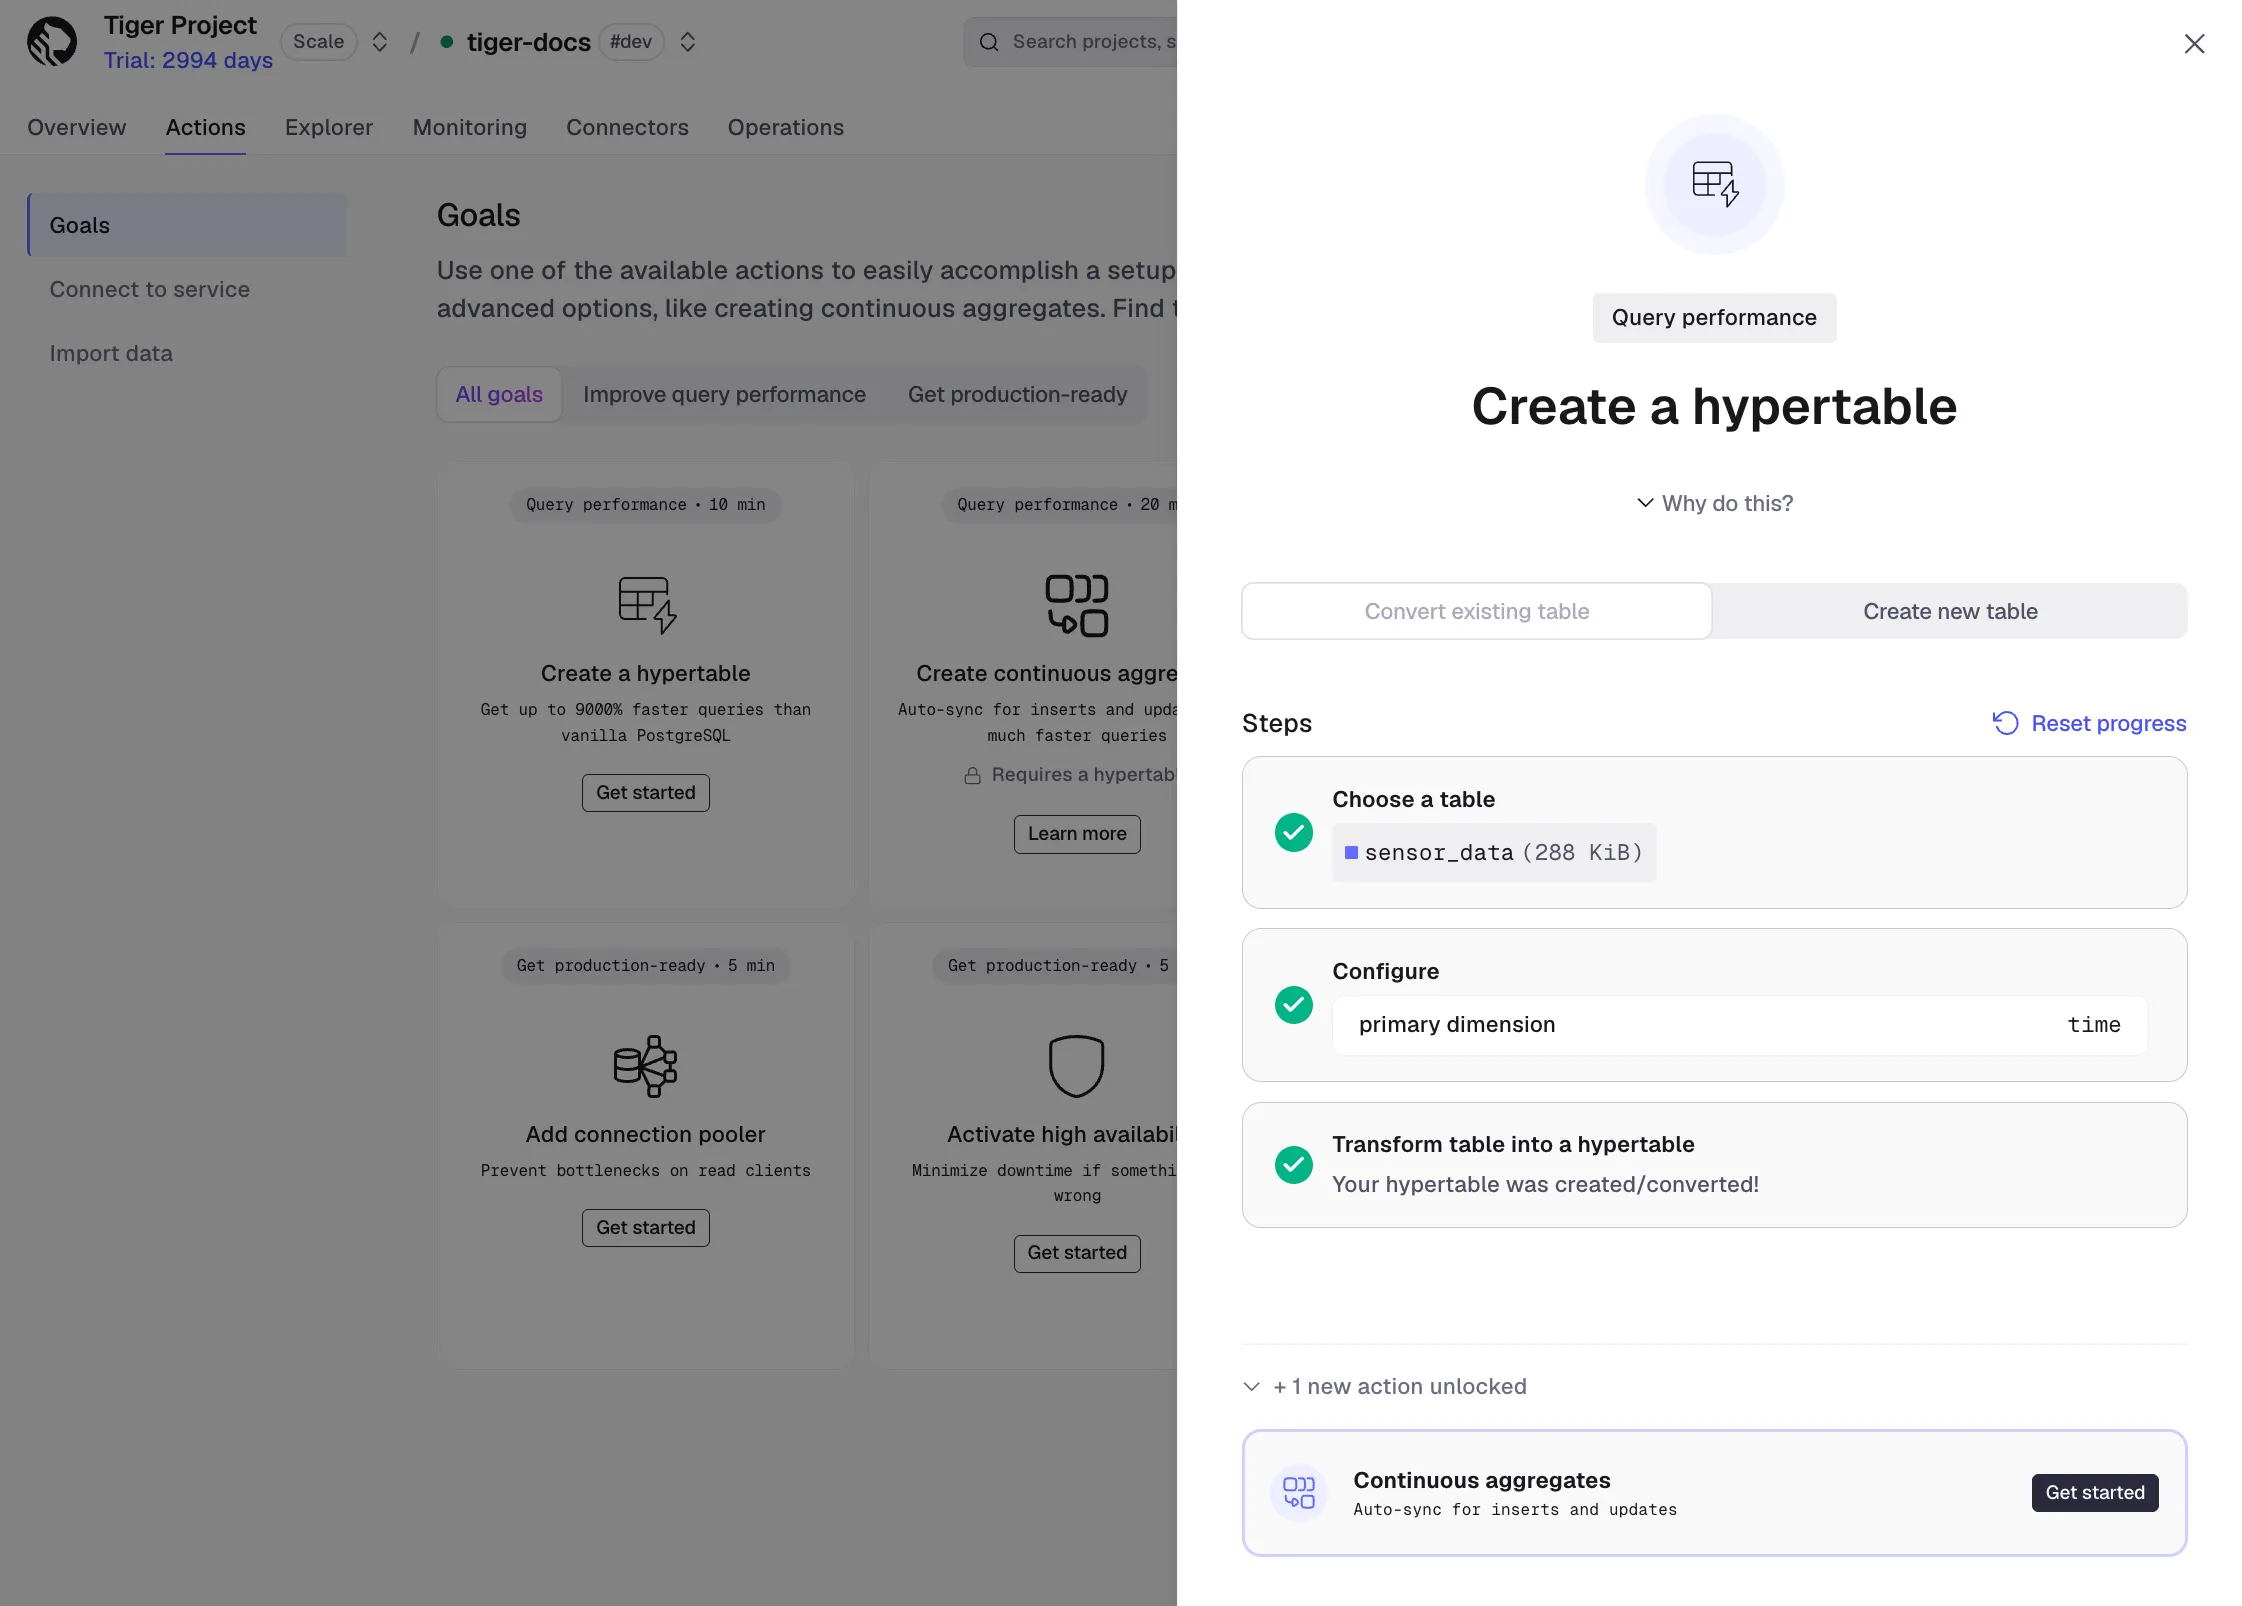
Under
Configure, select the column used to partition data into chunks, for exampletime. If the wizard reportsPrimary key change required, clickRunto update the primary key, then continue. - Transform the table into a hypertable
Your table is converted to a hypertable.
To convert a PostgreSQL table that already has data, use the create_hypertable() function
with migrate_data:
SELECT create_hypertable('existing_table', by_range('time'), migrate_data => true);For very large tables, this can be slow and lock-heavy. A safer approach is to create an empty hypertable and load data in batches:
CREATE TABLE new_table (LIKE existing_table INCLUDING ALL)  WITH (timescaledb.hypertable);
INSERT INTO new_table SELECT * FROM existing_table;
Learn more
Section titled “Learn more”- Partition a hypertable: Time, integer, and space partitioning.
- Sizing hypertable chunks: Choosing the right chunk interval.
- Hypertable indexes: Default and custom indexes.
- Primary keys, time columns, and uniqueness: Partition column and constraint rules.
- CREATE TABLE reference: Full API reference.
create_hypertable()reference: For converting existing tables.